When it comes to installing blackout curtains, the results can be totally worth the handiwork involved. A dark room helps to signal to our body that it’s time for rest and sleep. Whether someone works the night shift and sleeps during the day or their baby needs a mid-day nap, blackout curtains can be the key to helping them (or their child) fall asleep and stay asleep when it’s still light outside.
Installing anything can be daunting, especially if people are new to the game. Don’t worry – our team has broken it down into the simplest steps, so grab that tape measure, power drill, and – of course- those blackout curtains and let’s get started.
Watch our How-To video or follow the step-by-step instructions below. We’ve also included some helpful tips and tricks that we picked up during our installation!
How To Hang Blackout Curtains

1. Gather All Materials & Equipment
You’ll save yourself time and energy if you get your equipment and supplies together and organized before you start drilling into the wall.
Here’s a list of what you’ll need:
- Blackout curtains – make sure they say “blackout” in the description – they’ll give you the most coverage.
- Instructions – these should come with your curtain rod and hardware
- A curtain rod – one that fits the width of your window with some extra room
- Mounting brackets with set screws – they will probably come with your curtain rod and will hold the rod in place once you hang the curtains
- Set of screws and wall anchors – these should come with your curtain rod and will hold the rod on the wall and make ensure that the heavy curtains don’t pull it off the wall
- Curtain knobs – this keeps the curtains from falling off the rod
- Power drill with a drill bit – if you have it – if not, a hammer will do!
- Measuring tape – no brainer!
- Pencil – you want to make marks and erase them
- Hammer – you’ll need this if you don’t have a power drill and to tap the wall anchors into the wall

2. Unpack & Iron Blackout Curtains
Unpack your blackout curtains and clean them or iron them if needed. They should come with care instructions that let you wash them if you like.
They’ll probably have big creases from being folded and packaged for a long period of time. A light iron should get these folds and creases out and make them look much nicer once you hang them.

3. Measure Your Window
Before doing any drilling you want to measure how high you want your curtains to hang above your window and how far out on the sides you want the rod to go.
We have a wide but short window and we knew we had 3″ on the sides to work with and we planned to install the bracket 5″ above the window. We used a measuring tape and pencil to make marks in both of those spots on top and to the sides of the window.
Mark Your Drill Area
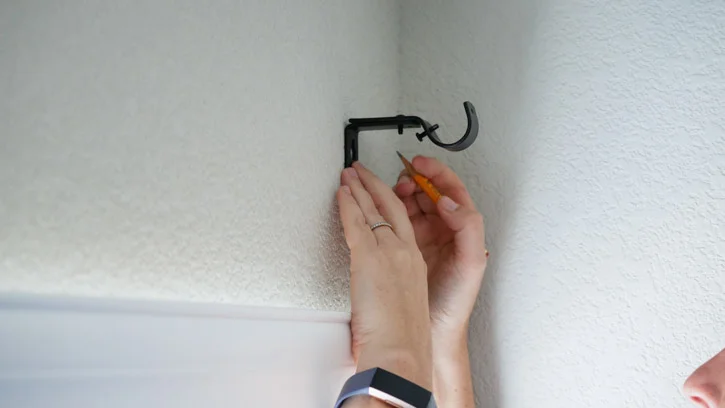 Now you know where you want your curtain rod to hang but you also need to mark where you’re actually going to add the screws.
You can do this by placing the bracket along the wall, matching the portion that will hold the curtain with your original mark (for us this was 5″ above our window).
Then find the area of the bracket that will hold the screw and make a separate mark there. This is where you actually want to drill.
4. Install Curtain Brackets
Drill A Pilot Hole
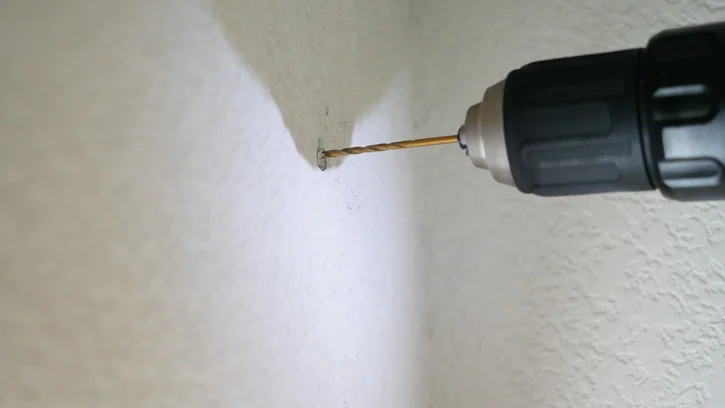 If you aren’t sure what’s behind your wall (drywall or a stud) you may want to drill a pilot hole at the screw mark. This will give you an idea of what you’re working with.
Once you drill into the wall and confirm you can move forward, find an appropriate sized drill bit and make a large enough hole to fit your wall anchor.
Hammer In The Wall Anchor
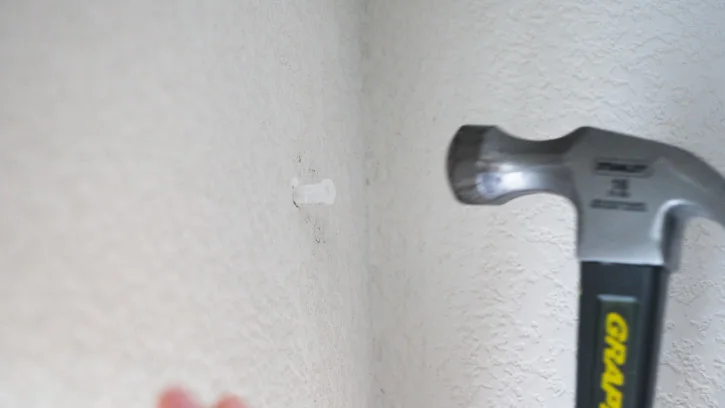 Place the wall anchor into the hole and tap it into the hole lightly with a hammer.
Install The Mounting Bracket With A Screwdriver
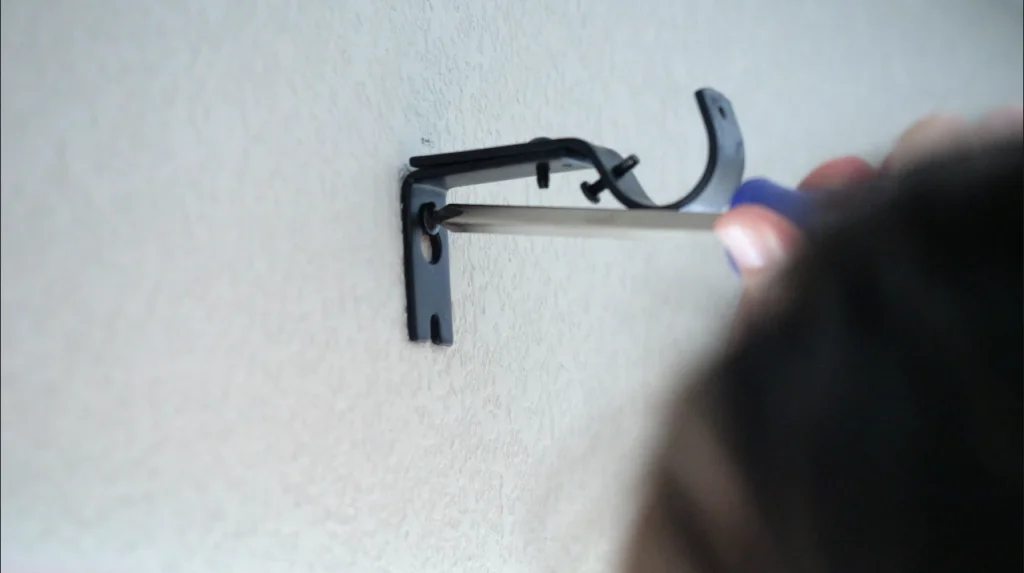 Add actual screw into wall anchor and secure it. Leave them all a little loose and tighten once they’re all in and even.

5. Add Curtain To Rod & Twist On Knobs
Attach your curtains to the curtain rod and screw or twist the knob at the end to keep your curtains on the rod.

6. Connect Curtain Rod & Hang
If you have a wide window, ask a friend to help you connect your curtain rod together and place it on the mounting brackets, securing the rod with your set screws.

7. Close Curtains & Nap!
Congratulations, you’ve hung your own blackout curtains! Now you can close them and take a much-deserved nap.
Extra Tips And Tricks
Rarely do projects ever go 100% as planned – and that’s OK! We learned a few things in the process of installing the blackout curtains ourselves and we wanted to pass the advice on to people:
- Get an idea of what’s behind the wall- There’s nothing worse than drilling into a wall only to hit a stud. Make a pilot hole or use a stud finder to double-check before starting to drill.
- Have extra materials handy- We went through quite a few wall anchors during this process. Extra screws, wall hangers, drill bits, all of that will be much appreciated if people end up breaking or losing something during the installation process.
- Grab a friend- Danny (our esteemed Senior Video Editor) was a much appreciated extra set of hands during our install. We had an especially wide window and he helped us with some of the drilling and hanging the blackout curtains.
- Be patient- It’s easy to tell one’s self that they’ll get this up in no time, only to find themselves covered in dust and sweat, screaming at the window because they broke their last wall anchor. People should take a deep breath and get back at it when they’re ready, they’ll be glad they did.
What’s The Benefit Of Blackout Curtains?
Blackout curtains are one way to make a bedroom as dark as possible. These are specifically designed to stop light from filtering through and come in the form of blackout curtains, blackout linings, or blackout blinds. Blackout curtains can also help muffle sounds from outdoors, particularly if people live on a busy street.
So, who might benefit from blackout curtains? While eye masks are an easy, portable way to make a sleeping environment seem as dark as possible — but they don’t work for everyone. If people toss and turn in their sleep, an eye mask may come loose in the night. And some people simply don’t like the feeling of fabric over their eyes or elastic straps against their head. For those people, blackout curtains may be helpful.
Blackout curtains are also useful in children’s bedrooms, especially for young children who may go to sleep before sunset. And if you are a night shift worker who sleeps during the day, blackout curtains may help you stay on your ideal rest schedule.